Knitting baby pants for 2 years. Knitting and crochet. Jumpsuit for little ones
Knitted products can rightfully be called universal. Especially for children. For example, knitted pants. They are irreplaceable at any time of the year. They don’t float in the summer because they’re breathable, but they keep you warm on cold days. Children always have freedom of movement and comfort in them.
Knitting panties
Mommy will be confident that the baby is wearing a comfortable and high-quality item made with love.
Taking care of these things will not be much of a hassle. Almost all modern automatic washing machines have delicate wash programs. Therefore, the biggest puddle is no longer so scary.
Knitting is easy and simple
Experienced craftswomen and novice needlewomen can knit clothes with knitting needles. Baby yarn with a melange color or intricate pattern will make your knitting of clothes for a girl or boy a fun adventure. You can find the most interesting schemes on our website.
The benefits of knitting pants with your own hands
you can choose the quality of the thread;
- choose the color and pattern of the product to suit your taste;
- it is possible to adapt any model you like to the age of the child;
- it can be an independent part of clothing or included in a set;
- the anatomical features of children are taken into account;
- the yarn is used again;
- It is especially important that it is possible to balance the price and quality of the product.
Simple and convenient model
Girls, we offer a simple and convenient way of knitting with the possibility of improvement to your taste. Since the model is seamless, it will be of interest to mothers with children under 1 year of age and older. For children older than the second or third year of life, pants can be decorated with applique or knitted decor. To work, you will need yarn, preferably special children's yarn. Especially if the child has a tendency to allergies. You need circular knitting needles (1 pair) and stocking knitting needles (5 pieces). Remember, all knitting needles must be the same size, otherwise the loops will turn out different and the item will be deformed. It's better if they are from the same company.
Let's get started in 3 stages
- We calculate the knitting density, namely the number of loops in 1 cm. Then we cast on a pair of loops on circular knitting needles, equal to the circumference of the hips. This is important if you decide to adapt a clothing model you like or, for example, your child is only one year old, but looks already a year and a half old. First, we knit the row with facial loops and connect the product. We make the first 6 rows with facial loops. For an elastic band with a tooth-shaped top edge, follow the pattern “2 knit stitches together and 1 yarn over.” Then we continue to knit the main part with facial loops, not forgetting to do fittings, so that later we can make the transition to the trouser legs. Please note that children's clothing should not be tight. We knit it easily so that the child feels comfortable.

- Divide the number of loops equally (remember that there were a pair of them). We leave one part of the loops on circular knitting needles, and distribute the second evenly on stocking needles. We continue to knit. The length of the trouser leg depends on the height of the child. Having knitted the main part of the pattern, we finish the product with an elastic band of 6 rows according to the pattern “1 front loop and 1 purl”. We knit the second leg in the same way. Depending on whether it is for a girl or a boy, the work can be decorated with a pattern. A more airy one is suitable for the summer version, and a dense one for the winter.
- The last stage is to knit an elastic band on the tummy - it needs to be hemmed. It can be done by hand or by machine. As an addition to the elastic band, it is possible to insert a weave belt or cord. We recommend decorating them with pompoms or tassels. Children's clothes are ready.
Reuse of threads

Considering that bistro children outgrow things, and after a year they are small without even being worn out, you can show your imagination. Threads can be combined and used again for something new and more interesting. If you carefully think through your child’s wardrobe, the combination of knitted clothes will create a unique style and the effect of constantly something new. Plus, you'll save a fortune.
With the onset of winter, every mother and grandmother faces a reasonable question: “What needs to be done to keep the baby from freezing outside while walking?” And a logical answer arises: “Insulate the newborn so much that even a long stay in the fresh air takes place in comfortable warmth and convenience.” And then every mother or grandmother (and maybe even dad!) solves this problem in her own way. Someone goes to the store and buys the warm clothes the baby needs. And someone sits down in a comfortable chair and starts knitting things with long knitting needles on cold, dark evenings, which also warm them with the spiritual care of gentle, beloved hands. And today you can try knitting your baby’s pants. These are the kind of funny warm pants you should end up with for your newborn baby. And if you have a baby, just take yarn of some other, delicate color and start knitting.
These pants are knitted quite simply, so even a less experienced needlewoman can do it. You can knit from both acrylic and wool yarn, but only if the newborn is not allergic to wool.
Materials and tools:
- 100 g of acrylic yarn of medium thickness, gray (or any color you wish);
- some white yarn for finishing;
- knitting needles No. 3.5 and 4, or suitable size for your yarn, 2 sizes.
Patterns:
- Elastic band 1 x 1: knit alternately 1 knit, 1 purl. In purl rows, knit according to the pattern.
- Facial surface: front rows - front loops, purl rows - purl loops.
- Hollow elastic: 1 knit, 1 purl, but knit only the knit stitches and leave the purl stitches unknitted, and pull the thread through before work.
Knitting density: 10 cm x 10 cm = 18 p. x 28 r.
Description of work
The pants are knitted immediately with a belt in two identical parts - front and back, which are then sewn together along the side and crotch seams.
Front part
Using smaller knitting needles, cast on 21 stitches from different skeins for each leg. Those. For one knitting needle, to simplify and speed up the knitting process, you need to cast on 21 loops for the right trouser leg from one skein and 21 loops for the left trouser leg from another skein.
If you are knitting from one skein, you can remove the second end of the thread from the middle of the skein and start knitting the second leg from there.
Use an elastic band 1 x 1 to knit 4 cm. You can knit an elastic band 2 x 2 as you like.
Knit 4 cm, switch to larger knitting needles and continue knitting in stockinette stitch, adding 1 loop 2 times on the inside of the legs (on those sides that are closer to each other on the knitting needle) in each 26th row. You should get 23 loops for each pant leg.
At a height of 20 cm from the beginning of knitting, combine the loops of both legs. To do this, 20 cm from the beginning of the legs, you begin to knit the next row of one leg.
Having knitted it to the end, cast on 4 more loops in any way convenient for you, and continue knitting the second leg without changing the thread, i.e. You should get a single fabric of 50 loops - 23 loops x 2 + 4 loops. The thread with which you knitted the second leg must be cut, and the end secured and hidden.
To do this, you need to knit only the knit stitches in both the front and back rows, and remove the purl ones from the left knitting needle to the right one without knitting, and pull the thread through before work.
In this way, a hollow elastic band will begin to form - the canvas will split into two, because the loops are knitted through one (the front ones are knitted, and the purl ones are pulled out, remaining unknitted).
At a height of 40 cm from the beginning of knitting, close all the loops according to the pattern; to do this, you need to remove the first loop, knit the next loop according to the pattern and pull it through the removed loop. Repeat the manipulation until the end of the row.
Knit the back half of the panties with knitting needles in the same way as the front half.
Assembly
On the front part, at knee level, you can optionally embroider circles with white thread using regular stitches as in the photo.
Sew side and step seams. When sewing, you need to make sure that the seam does not connect both sides of the belt, otherwise you will not be able to thread the lace.
To do this, the seam must first be laid along the outside of the product, and then move to the inside. You can stitch with a needle and thread using a “needle forward” stitch, or with a crochet stitch using connecting posts (the so-called “pigtail”).
Make a lace from a white thread (or any other color, if desired) by twisting several threads together. You can also weave a braid or any other lace from the threads. Then thread the lace through the waistband drawstring using a safety pin.
The finished panties can be moistened and left to dry.
Original pants for a baby: detailed video MK
Children's tights knitting needles for a child aged 2-3 years, an absolutely irreplaceable thing in the wardrobe. They are cozy, warm, and most importantly, unlike store-bought ones, they will be knitted by caring hands from natural yarn and the right shade. Using the same pattern, if you don’t want to bother with a sock, you can knit leggings or gaiters.
 We are posting this simple model for those who don’t have a lot of time to knit complex patterns, but also want to knit something for their baby with their own hands. Choose bright, elegant threads or add a pattern, but in general these pants for newborns knitted simply and quickly.
 It's hard to imagine a little girl's wardrobe without elegant tights. These are exactly the ones we suggest you knit for your baby. White fishnet tights for girls.
Leggings for girls
 Leggings are probably the best addition to a warm, elegant dress for a girl, instead of the usual tights. Tie these, let him learn to be fashionable. Moreover, they are not difficult to knit at all.
 Now in fashion tight pants and other leggings, it’s also worth knitting such pants for little ones, they will look great not only with sweaters and blouses, but also with knitted dresses and tunics .
Warm pants for a 2 year old girl
 To make them warm, it is best to take woolen threads, and for such pants to keep their shape, it is better, after all, for these threads to contain from 10 to 30% artificial thread.
How to knit trousers for girls
 If you have small children, then what a blessing that you know how to knit. But, perhaps earlier you knitted only for yourself, but now is the time to learn how to knit for your kids. We present you a detailed description.
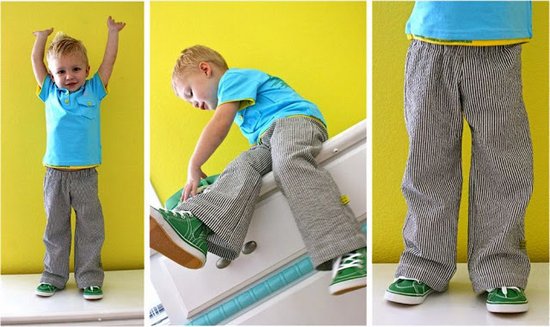
Pants and many other models. We invite you to sew children's pants for a boy 1.5 - 2 years old, with cuffs. They are shortened due to which they will look very cute on the baby.
Materials and tools:
- Green cooler (or other suitable knitwear) – 0.5 m
- Gray ribana – small piece
- Threads, needle
- Tailor pins
- Scissors
- Pattern paper
- Sewing machine
- Rubber
- Pattern of children's pants

To begin with, you will need a pattern of pants for a boy 1.5 - 2 years old.
This model is very funny: the baby will have a sewn circle on his butt. For home use, you can sew this circle in a different color (then the clothes will look like pajamas or underpants), but for a more solid option, take fabric of the color from which you will make the main part of the model.
We offer you a pattern of pants for a boy, designed for a child 1.5 - 2 years old, 86 cm tall. Enlarge this part so that the left edge reaches 28 cm and print it out.

The pattern contains two more parts: for the insert circle and the cuffs. Enlarge the circle pattern so that from the most convex part on the left to the same on the right there is 16 cm, and the cuff pattern so that the middle line is 20 cm. Print these parts.

How to sew pants for a boy 1.5 - 2 years old:
1. Fold the green knitwear in half and attach the edge of the panties pattern along which the dotted line is drawn to the fold. Secure the paper to the fabric with pins and cut out the piece, making 7 mm allowances on all sides except the fold.

2. This is what the main part of the panties should look like. The central cut will be a crotch seam, the two side semicircles will close at the back. As a result, you will have cropped pants (just below the knees) without a seam in the front, but with a seam in the back.

3. Cut out the remaining parts - two of each. Look closely at the semicircle detail. It will need to be cut out in two copies in a mirror image. In this case, the paper should be placed on the fabric so that the lines of the knitwear are directed along line A on the pattern. Accordingly, you need to cut on the front side in order to guess with the knitwear pattern. Well, you can bend the cuff pattern in half along the dotted line to save time. Attach it to the gray rib and cut out two identical parts.

4. Attach one of the semicircles to the cutout of the main part and secure with tailor’s pins. There should be an extra “tail” of the semicircle at the bottom. Do the same on the other side of the main part of the pants.

5. Sew semicircles to the panties. To do this, you can use a zigzag stitch with a small distance between stitches.

6. Fold the main part of the panties with the right side inward, pin the part from the top of the product to the tip of the semicircle. Machine stitch this seam using the same zigzag stitch.

7. To assemble the product, there is only one seam left to make - the step seam. Sew separately the legs and the part from the top of the legs to the tip of the semicircles.

8. Now make the cuffs. Bend the cut gray parts in half and iron them. Then straighten and stitch them, closing them into rings. Fold in half again - you get two double rings.

9. Attach these rings to the bottom of the pants (with the cut of the fabric facing the cut of the pants) and baste, evenly positioning the rib. To do this, you need to stretch it slightly.

10. Turn the ribbed fabric downwards and make another basting stitch to secure the two materials together.

11. Sew using an elastic zigzag (dotted) or other elastic stitch.

12. The pants are almost ready - all that remains is to process the upper edge of the product. Fold it twice and secure with pins. Make a basting stitch.

13. Sew with a regular dotted seam, stepping back from the edge as much as needed for the width of the selected elastic.

14. Use a safety pin to thread the elastic through and sew the ends together.

That's all, baby diaper pants for a boy are ready! They complement well and are suitable for a cool summer day!
By the way
If your baby already walks without diapers, you can safely shorten the top part of the pants by 3 cm. Otherwise, the elastic will sit above the waist.
I hope this pattern and description of sewing pants for a boy will be useful to someone.


Children's trousers are an essential item for both boys and girls. These are the most comfortable clothes for walking, playing, traveling, and just for everyday wear. And modern styling makes the trousers very elegant. But which ones to choose so that they are both convenient and practical at the same time? From my own experience, I can note that trousers should have a waist no lower than medium and with an elastic waistband; the latter detail is especially important for small children. Thanks to the elastic band on the waist, the pants fit snugly to the baby’s body, do not bulge, slip or press.Well, for older children you can already sew trousers with zippers and pockets, like real jeans.
Pattern for children's trousers for ages 2 to 10 years
The simplest and most comfortable trousers are the sports-style model with elastic. Children are very comfortable in such clothes, and mother, in turn, can easily and simply handle the sewing.
In MK, for this pattern it is proposed to sew pants from double fabrics, the upper one is mesh, and the lower one is elastic synthetic fabric. But you can sew from any other fabric and not necessarily in two layers.


Details of the pants: orange - lining, dark - faces. side
Download the PDF pattern, print and glue the sheets. Select the appropriate size (plate below) and cut out. Transfer the details onto the fabric. Cut and sew the pieces.

Fold the top edge and sew, insert an elastic band. Process the bottom of the trousers. Stripes can be sewn on the sides if desired.

Master class: how to sew pants for a child

Step 1. Print out the pattern and transfer it to the fabric. Cut, leaving 2 cm allowance at the edges.

Step 2. Complete all seams.

Step 3. Measure the width of the waistband of one leg. Using stretch fabric, make a belt and cuffs of the appropriate width. Sew and fold in half.

Step 4. Sew the pieces to the panties.

Pattern for children's trousers with elastic
This pattern of children's trousers is designed for children 2-3 years old. Below you can download it and watch a master class on sewing these pants. The required amount of fabric is 90 cm.
Master class: trousers with elastic

Step 1. Print the pattern and transfer the details to the fabric. Cut it out.


Step 2. Complete all seams one by one.

Step 3. Finish the edges with an overlocker.


Step 4. Tuck the top edge to the width of the elastic. Sew, leaving a small area open. Insert the rubber and sew up the remaining area. Sew the waistband along with the elastic.

Step 5. Overlay the bottom edges. Turn and sew.

How to sew children's pants from a sweater: master class
And another master class with a clear example of how to sew warm pants for a baby from an unnecessary sweater.


